Create a Snowflake connector
Connecting to your Snowflake instances as a connector allows you to access tables and views within your Snowflake account and to then create them as Data Assets on the Platform. Here you are defining the location of the data you reference from the platform.
You must have a Snowflake account https://signup.snowflake.com/
You must have the Technician role to perform this action
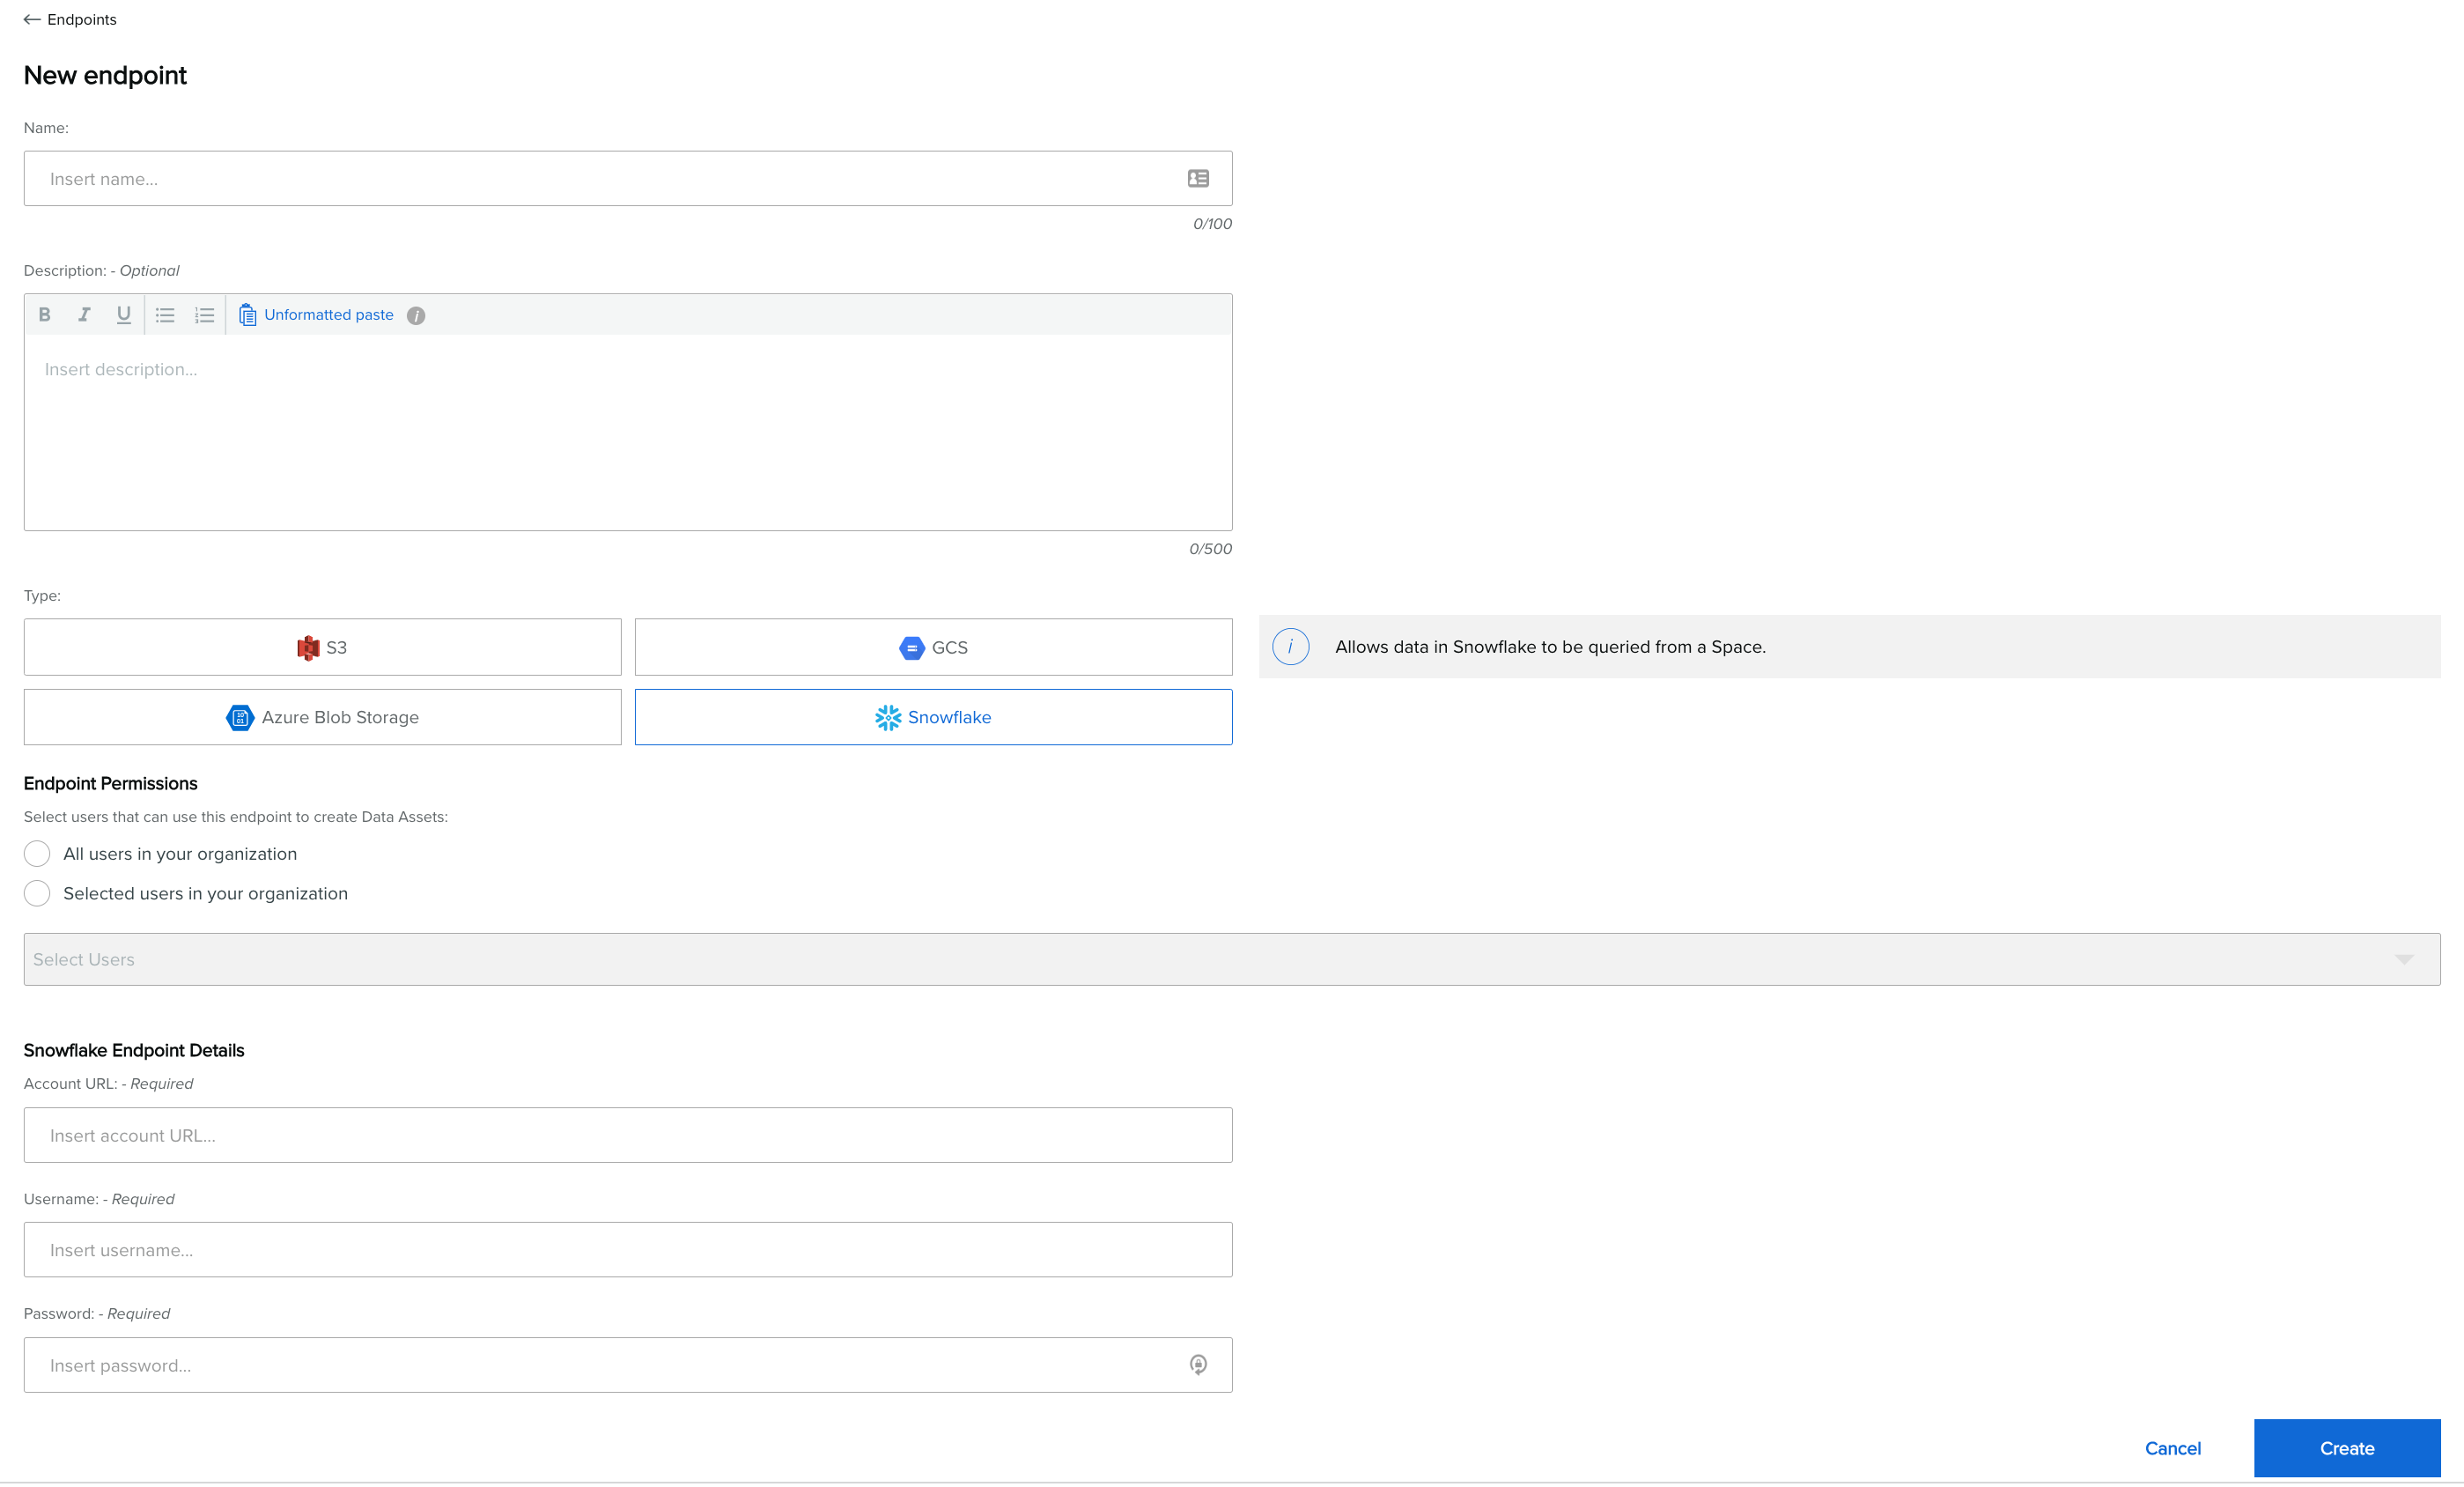
Find and click the Connectors option under the Manage menu.
Click Create Connector

Enter the connector Name.
Enter the connector Description (optional).
Select Snowflake as the Type of connector you want to setup.
Define which users in your Organization should have the ability to access the Snowflake connector by selecting individual users or all users in connector Permissions. Users with access to this connector can create Data Assets from it.
Insert Snowflake connector Details (Required).
Account URL.
Username.
Password.
note that if you change your password then you must update the details in your connector to ensure that any dependant Data Assets can still be accessed.

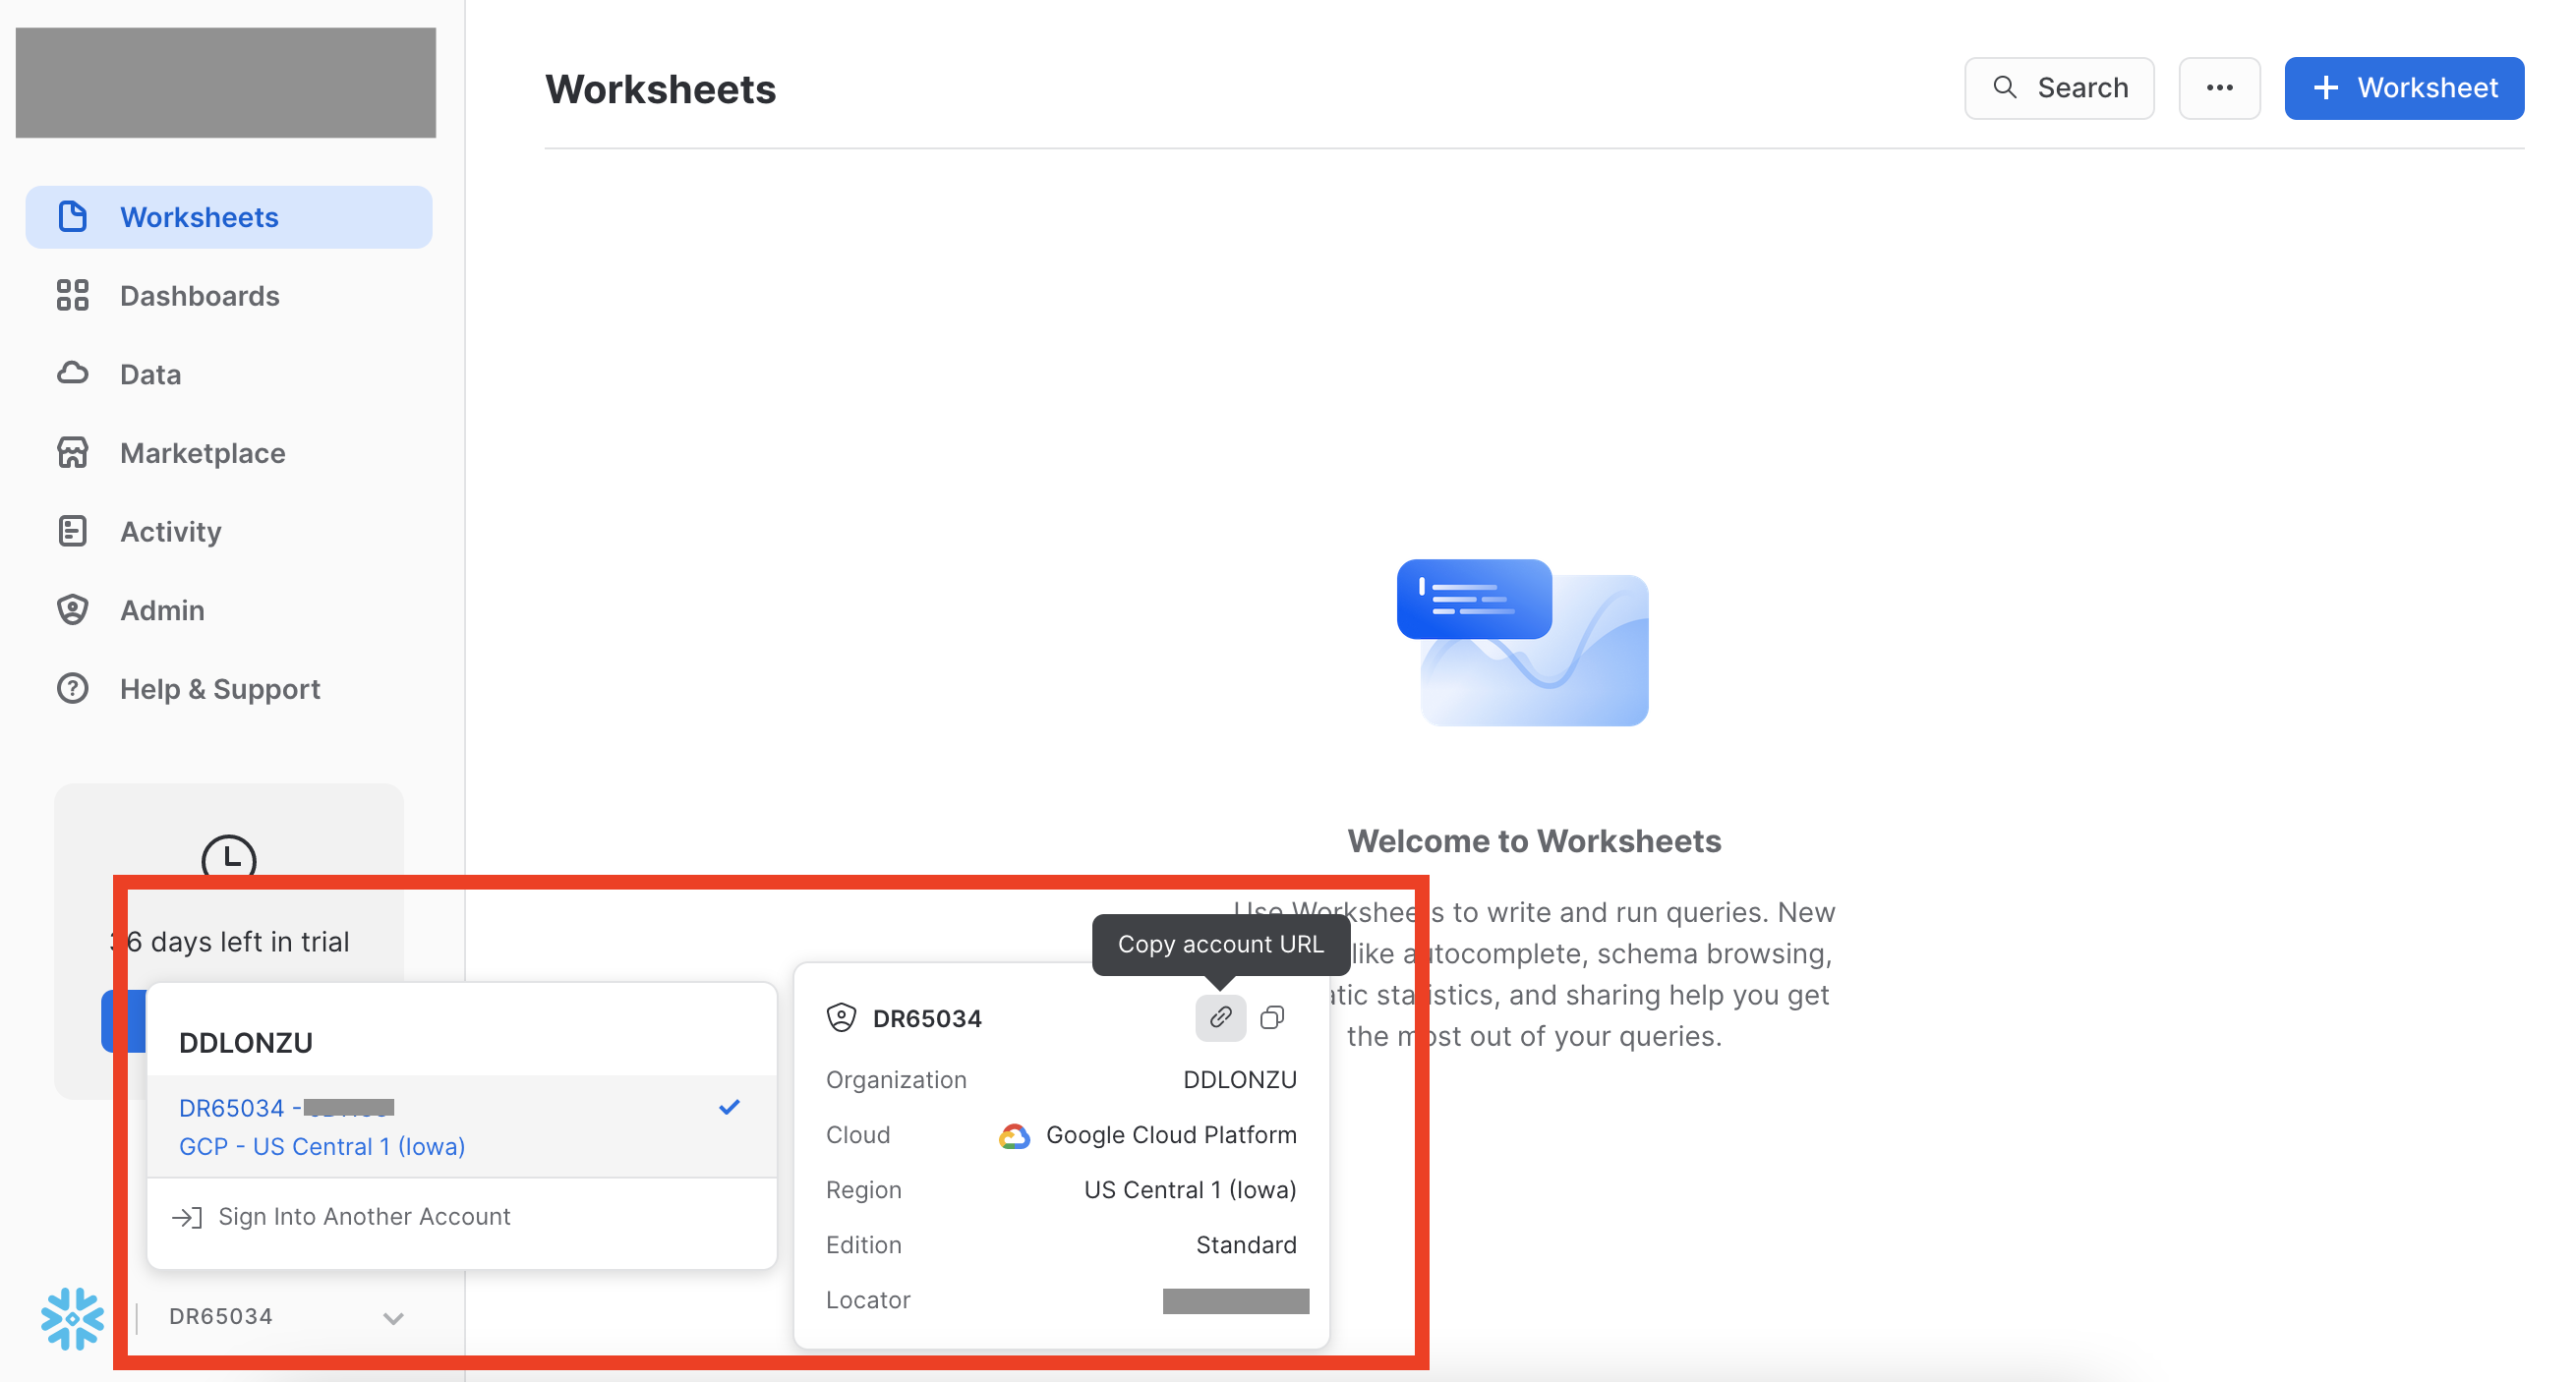
How to find the Account URL in Snowflake
7. Click Create to test and create the connector. If the connection test fails then click on the < to view to the connection error message and resolve or contact Support for assistance.

Now you are ready to create and share a remote Snowflake Asset
